In this Artical we will see how to establish communication between computer/mobile to Arduino in a LAN or Wireless Network. We are interfacing the ENC28J60 Ethernet controller to Arduino so that our Arduino will be the one of member of that network. Once it will done the arduino can control things in that network or the arduino can be controlled by the other devices of that network it might be computer or mobile. Interfacing Arduino with the ENC28J60 will further gives us the freedom of using the internet on Arduino but before that we need to learn how to do all that networking stuff in a locan network.
Soon I will post about how to control the things in local network, how to send data on a local network, and how to interfaced with Android devices or how to make IOT Devices. IOT Devices are quite famous.
A simple block diagram of the data flow is in the image below.

Ethernet Module( ENC28J60): Microchip's ENC28J60 is a
28-pin, Ethernet Controller with on board MAC &
PHY, 8 Kbytes of Buffer RAM and an SPI serial interface. With a small
foot print package size the ENC28J60 minimizes complexity, board space
and cost. It used in so many application like Industrial Automation,
Building Automation, Home Control, Security and Instrumentation, IOT Devices.
You can build Your own circuit but I use the Module to save my time.

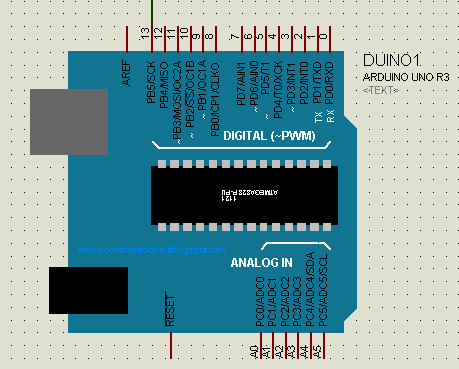
VIRTUAL SIMULATION: I first simulate my design on the Proteus ISIS to make sure I am working in right direction and also to save my time. In ISIS their is already a component named "ENC28J60 ethernet controller" so I picked it from the library. Now I picked up the Arduino and connect it with the ethernet controller.
if the link dont work please comment

Now make these connection in the ISIS design tool.

SOFTWARE: Now we all done with the Virtual Hardware Design lets make the software. All you need is the Ethercard Library for this example. Download it from here EtherCard. Click here
- Extract the ZIP file , copy and paste the folder in your Arduino1.xx/library/
- once you place the folder in your arduino library folder restart your Arduino IDE
- Now go to ethercard > Examples > backsoon

Compile the code : if facing any problem then go to : How To Simulate Arduino in ISIS
Make some changes in the program as given below
changes are in Red colour
Arduino code
/*#############################################################################
###############################################################################*/
// Present a "Will be back soon web page", as stand-in webserver.
// 2011-01-30 <jc@wippler.nl> http://opensource.org/licenses/mit-license.php
#include <EtherCard.h>
#define STATIC 0 // set to 1 to disable DHCP (adjust myip/gwip values below)
#if STATIC
// ethernet interface ip address
static byte myip[] = { 192,168,1,200 };
// gateway ip address
static byte gwip[] = { 192,168,1,1 };
#endif
// ethernet mac address - must be unique on your network
static byte mymac[] = { 0x74,0x69,0x69,0x2D,0x30,0x31 };
byte Ethernet::buffer[500]; // tcp/ip send and receive buffer
// char page[] is the HTML page you are uploading ..
char page[] PROGMEM =
"HTTP/1.0 503 My Seriavice \r\n"
"Content-Type: text/html\r\n"
"Retry-After: 600\r\n"
"\r\n"
"<html>"
"<head><title>"
"2embeddedrobotics "
"</title></head>"
"<body>"
"<h3>Welcome to 2embeddedrobotics</h3>"
"<p><em>"
"The World of IOT Devices .<br />"
"yipeee Congrats...."
"</em></p>"
"</body>"
"</html>"
;
void setup(){
Serial.begin(9600);
Serial.println("\n[backSoon]");
if (ether.begin(sizeof Ethernet::buffer, mymac) == 0)
Serial.println( "Failed to access Ethernet controller");
#if STATIC
ether.staticSetup(myip, gwip);
#else
if (!ether.dhcpSetup())
Serial.println("DHCP failed");
#endif
ether.printIp("IP: ", ether.myip);
ether.printIp("GW: ", ether.gwip);
ether.printIp("DNS: ", ether.dnsip);
}
void loop(){
// wait for an incoming TCP packet, but ignore its contents
if (ether.packetLoop(ether.packetReceive())) {
memcpy_P(ether.tcpOffset(), page, sizeof page);
ether.httpServerReply(sizeof page - 1);
}
}
/*##############################################################################
###############################################################################*/
now compile the code with prefrence compile. in file option.. so that you will get the .HEX file for ISIS.


open the web browser and write the IP address of your arduino in the browser.


Now you have done then note your IP from the serial monitor and Enjoy..
Wish you a very good Luck.

Make some changes in the program as given below
changes are in Red colour
Arduino code
/*#############################################################################
###############################################################################*/
// Present a "Will be back soon web page", as stand-in webserver.
// 2011-01-30 <jc@wippler.nl> http://opensource.org/licenses/mit-license.php
#include <EtherCard.h>
#define STATIC 0 // set to 1 to disable DHCP (adjust myip/gwip values below)
#if STATIC
// ethernet interface ip address
static byte myip[] = { 192,168,1,200 };
// gateway ip address
static byte gwip[] = { 192,168,1,1 };
#endif
// ethernet mac address - must be unique on your network
static byte mymac[] = { 0x74,0x69,0x69,0x2D,0x30,0x31 };
byte Ethernet::buffer[500]; // tcp/ip send and receive buffer
// char page[] is the HTML page you are uploading ..
char page[] PROGMEM =
"HTTP/1.0 503 My Seriavice \r\n"
"Content-Type: text/html\r\n"
"Retry-After: 600\r\n"
"\r\n"
"<html>"
"<head><title>"
"2embeddedrobotics "
"</title></head>"
"<body>"
"<h3>Welcome to 2embeddedrobotics</h3>"
"<p><em>"
"The World of IOT Devices .<br />"
"yipeee Congrats...."
"</em></p>"
"</body>"
"</html>"
;
void setup(){
Serial.begin(9600);
Serial.println("\n[backSoon]");
if (ether.begin(sizeof Ethernet::buffer, mymac) == 0)
Serial.println( "Failed to access Ethernet controller");
#if STATIC
ether.staticSetup(myip, gwip);
#else
if (!ether.dhcpSetup())
Serial.println("DHCP failed");
#endif
ether.printIp("IP: ", ether.myip);
ether.printIp("GW: ", ether.gwip);
ether.printIp("DNS: ", ether.dnsip);
}
void loop(){
// wait for an incoming TCP packet, but ignore its contents
if (ether.packetLoop(ether.packetReceive())) {
memcpy_P(ether.tcpOffset(), page, sizeof page);
ether.httpServerReply(sizeof page - 1);
}
}
/*##############################################################################
###############################################################################*/
now compile the code with prefrence compile. in file option.. so that you will get the .HEX file for ISIS.
Now you have done every thing . Hit the Play Button and it will give you the assigned IP address in serial monitor now write it down on a paper.
open the web browser and write the IP address of your arduino in the browser.
Now you can watch this page on any device connected to that network As I show.
HARDWARE: We already did everything in virtual now we just need to connet each component as per the connection given in starting.
Now upload the program to your Arduino and turn on its Serial monitor so that u can get Your
"IP in Serial Monitor" and just open browser and put your IP and check the webpage.
Now you have done then note your IP from the serial monitor and Enjoy..
Wish you a very good Luck.
Ethernet(ENC28J60) Interfaced Arduino
13:41